Putting your project under version control can greatly help you make your project reproducible. It lets you try out different versions of an analysis and still revert back to a previous one. Furthermore, it can save you a lot of time down the line when you want to track down a bug and you are not sure when it got introduced or how the code looked before you changed that one buggy function.
A prominent option for a version control system is Git. It allows you to easily keep track of all the changes that you or your collaborators make to text-based files (text documents, code files, etc.) over time while working on a project. A project that is versioned using git can then easily be hosted online to share it with the world using the free (at least in its basic version) web service GitHub. It also includes many useful tools for collaboration with others. Git and GitHub offer a lot of functionality, which might feel overwhelming at first. But don’t worry, it really is sufficient to just focus on the basics (see the tutorials mentioned below) to get up and running with version control and apply it to your project. One of the things you should definitely take a look at is the git diff command. You can use this command to display differences between two versions of a file, allowing you to see a simple yet detailed traceback of your changes.
Note: While working on a project that is hosted on GitHub, you can set the project to private mode if you upgrade to at least a developer account, which will prevent others from accessing it until you make it public. Students get a developer account for free as part of the Student Developer Pack.
Installation of the necessary software
To install Git, follow the respective installation guide for your operating system linked in this DataCamp Tutorial. This is basically all the software you need to put your project under version control. However, there is one exception if you work with Jupyter notebooks. The git diff mentioned above only works with a Jupyter notebook if you install the additional plugin nbdime. Without it, comparing two notebooks will look something like this:
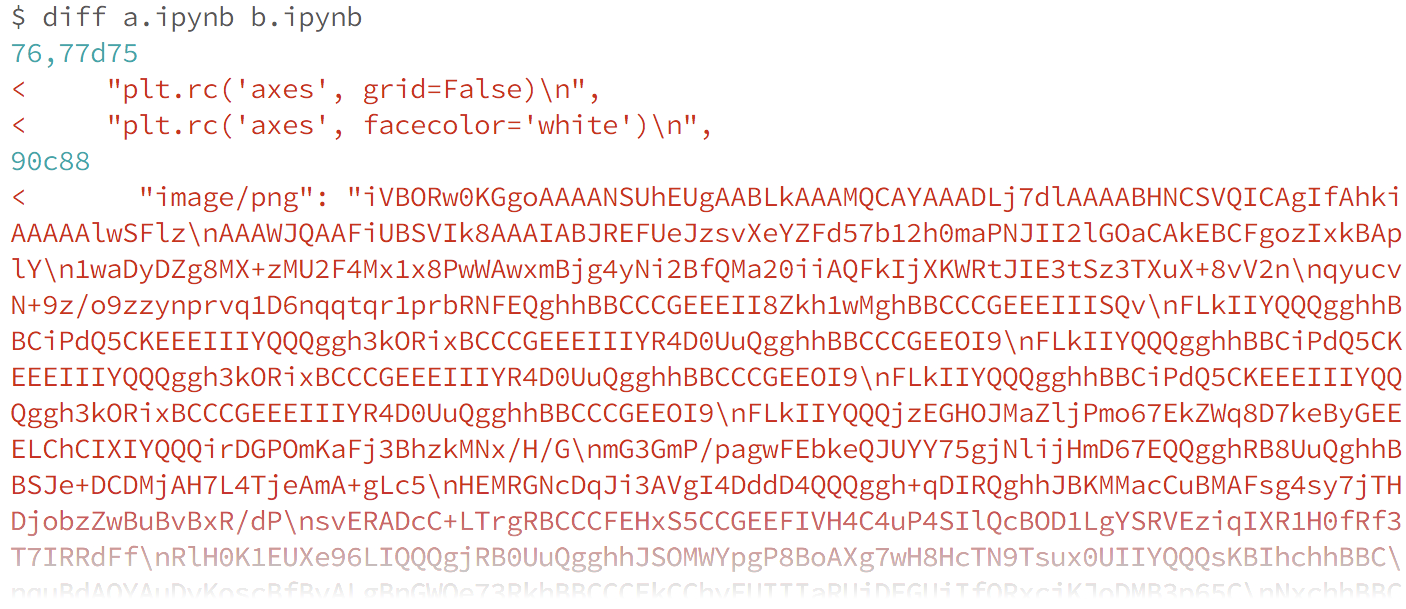 Source: nbdime documentation
nbdime provides various tools to make Jupyter notebooks and Git work in harmony. One of them even gives you an actual graphical user interface to access changes.
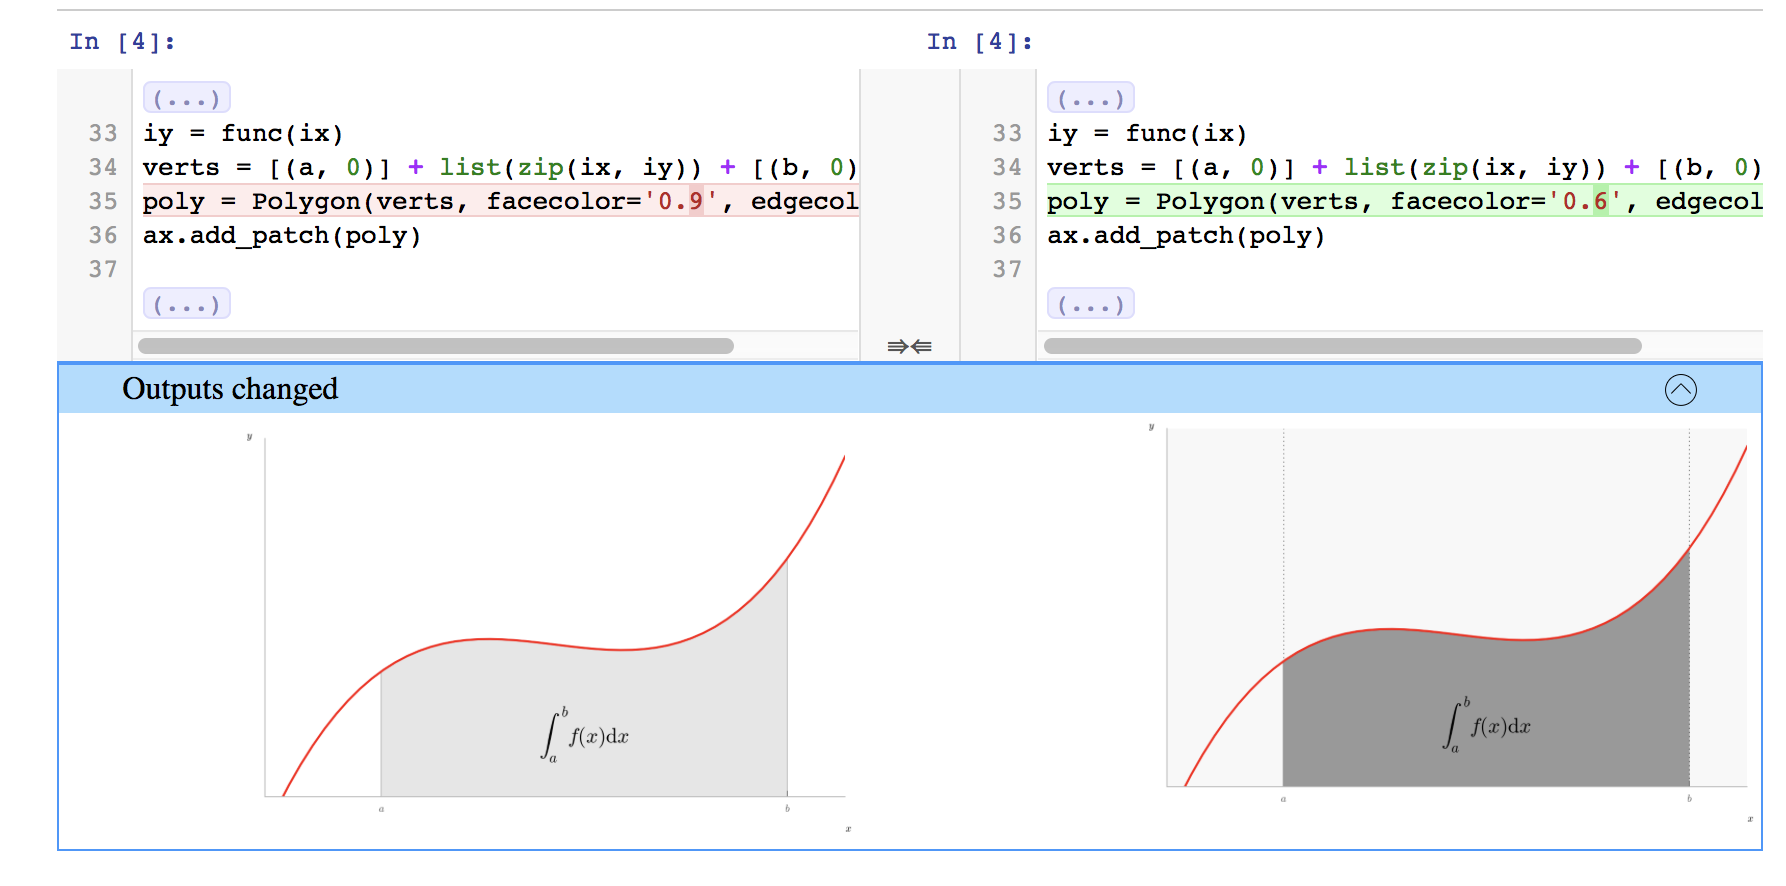 Source: nbdime documentation
How cool is that? You can install with conda by typing the following command into your terminal:
conda install -c conda-forge nbdime
Now you need to set up the git integration with
nbdime config-git --enable --global
That’s it. Git is now Jupyter notebook compatible. See the nbdime documentation for examples on how to use it.
Command line vs. GitHub Desktop
You are now ready to put your first project under version control and create your first repository.
“A repository, or Git project, encompasses the entire collection of files and folders associated with a project, along with each file’s revision history.” - Git Handbook GitHub Guides
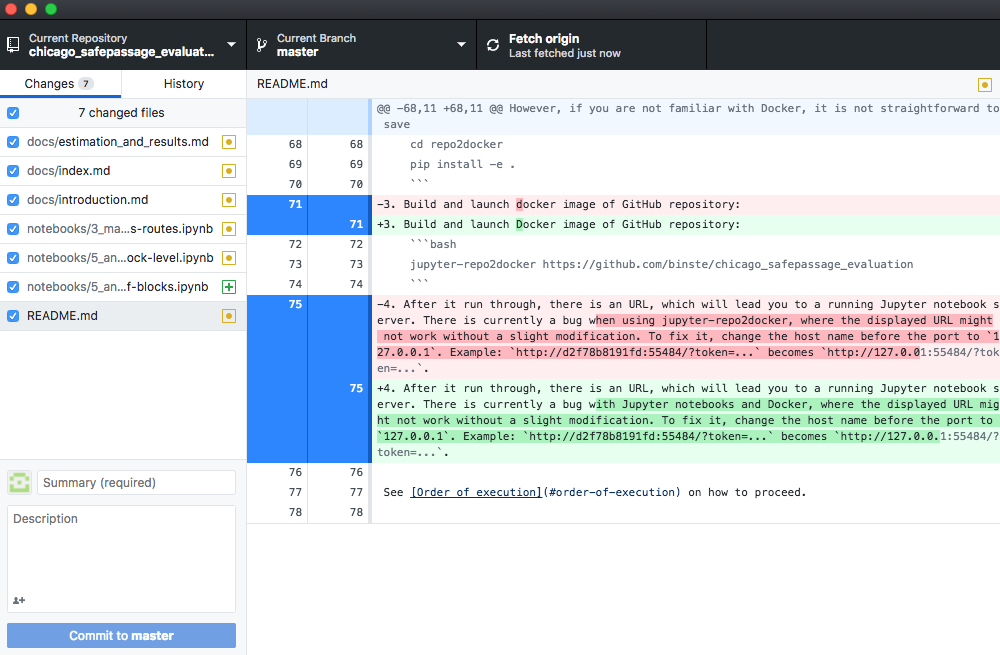
To interact with Git, you have two options. You can either issue commands to it over the command line or use a graphical user interface (GUI) such as GitHub Desktop. Compared to the later, the command line offers more flexibility in terms of what you can do as well as where – think of working remotely over command line on a server. But again, if you have never worked over the command line before, the following might look more appealing to you:
You can find all the information for an easy setup and usage of GitHub desktop in the official guides Getting Started with GitHub Desktop and Contributing to projects with GitHub Desktop, which also show how to add your own project to GitHub using the GUI. For an introduction to the command line interface, I highly recommend the free DataCamp course Introduction to Git for Data Science. Should you plan on doing a smaller project without using Git for collaboration, you’re even fine with watching just the first part called “Basic workflow.” To connect git to GitHub over the command line, see the Set up git tutorial by GitHub.
Data
If you have the permission to publish your raw data files, you can also put them into version control and even upload them to GitHub (if they fulfill certain size requirements). Single files must be below 100MB, and the total repository should stay below 1GB. Should you not be able to upload your raw data (also for legal reasons), make sure to include all the necessary information on how to obtain the exact same data you used in a documentation. You’ll learn how to do this in the next section of this guide.
You now know how to set up the development environment, a well-organized folder structure, as well as a version control system – all of which are already of immense value to the clarity and reproducibility of your research project. Maybe you have already started to clean your data in a notebook. It is now time to talk about documentation, to make sure that your codebase stays tidy and comprehensible and that at the end of your project, you will still know where the raw data actually came from.